How to Clean and Care for Your Nasal Rinse Bottle
You would never brush your teeth with a toothbrush that had been sitting wet in a drawer for a month. You would not drink from a water bottle you had not washed since last summer. Yet plenty of people use a nasal rinse bottle every day without giving much thought to what happens inside it between uses.
It is an easy thing to overlook. People put real care into choosing the right solution and the right water for their nasal rinse, and then leave the bottle to dry on a damp bathroom counter, cap screwed on, until the next morning. Over time, that small oversight adds up.
The bottle is the one piece of equipment that touches every single rinse you do. Keeping it clean is not complicated and does not take long, but it does need to become part of the routine. This guide covers everything you need to know: why bottle care matters, how to clean your bottle after every use, how to do a deeper clean, when to replace it and how to store it properly.
Why bottle care matters
Rinse bottles spend their lives in bathrooms, which are among the warmest and most humid rooms in the house. Steam from showers, splashes from the sink and limited airflow all create conditions where moisture lingers.
When a bottle is put away while still damp, especially with the cap on, any moisture left inside the bottle, cap or tube stays there. Residue from the solution can also build up over time in hard-to-reach spots like the inside of the cap or the base of the tube.
Regular cleaning and proper drying keep your device fresh and ready for its next use. It is a small amount of effort that makes your whole routine cleaner.
What you will need
You do not need special equipment. A basic cleaning kit includes:
- Mild dish soap, unscented if possible
- Hot water from the tap for washing
- A small bottle brush that can reach the bottom of the bottle
- A clean drying rack or paper towels
- Distilled or boiled water for an optional final rinse, if your bottle maker suggests it
Keep these together near your rinse station so cleaning becomes automatic.
After every use: the daily clean
This takes about a minute and should happen every single time you rinse.
- Empty it completely. Pour out any leftover solution. Never keep mixed solution for later use.
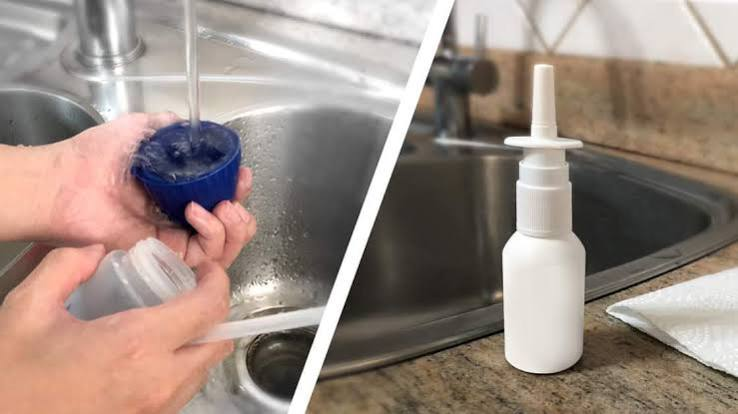
- Wash with hot soapy water. Add a few drops of mild dish soap and some hot water, put the cap on, and shake well. Squeeze some soapy water through the tip so it flows through the tube and nozzle.
- Rinse thoroughly. Flush the bottle, cap and tube with clean water until no soap remains. Some makers suggest a final rinse with distilled or boiled water.
- Take it apart. If your bottle has a removable cap, tube or valve, separate the pieces so each one can dry properly.
- Air dry upside down. Stand the bottle upside down on a clean paper towel or drying rack, away from the sink’s splash zone. Lay the cap and tube flat beside it.
- Let it dry fully before reassembling. Only put the pieces back together once everything is completely dry.
That is it. The whole process becomes second nature after a week or two.
The weekly deep clean
Once a week or so, give your bottle a more thorough clean. The exact method depends on what your bottle is made of and what the manufacturer recommends.
Follow the maker’s instructions first
Bottles are made from different materials and designed in different ways. Some are top-rack dishwasher safe; others are not. Some can handle very hot water; others may warp or crack. Some makers suggest specific cleaning methods; others warn against them.
The golden rule is simple: if the instructions do not mention a cleaning method, do not assume it is safe. When in doubt, stick with hot soapy water and a thorough scrub.
Use a bottle brush
A small brush reaches the bottom corners of the bottle and the inside of the cap, where residue tends to collect. Scrub gently, paying attention to threads, seams and the nozzle opening.
Clean the tube
If your bottle has an internal tube, remove it if possible and run soapy water through it. A pipe cleaner or thin brush can help, as long as the maker does not advise against it.
Inspect as you clean
The weekly clean is a good moment to check your bottle for signs of wear. More on that below.
When to replace your bottle
Bottles do not last forever. Plastic can scratch and wear over time, and those small scratches are harder to clean. Many manufacturers recommend replacing rinse bottles after a set number of months, so check the guidance that came with yours.
Replace your bottle sooner if you notice any of the following:
- Cloudiness or discoloration that will not wash out
- Cracks or deep scratches on the bottle or cap
- A cap that no longer seals properly
- A tube that is stiff, bent, cracked or hard to clean
- Any lingering odor, even after washing
- A nozzle that is damaged or no longer fits comfortably
A simple trick is to write the start date on a small piece of tape stuck to the bottom of the bottle, or set a reminder on your phone. That way you will know exactly when it is due for replacement.
Neti pot care
If you use a neti pot instead of a squeeze bottle, the same principles apply. Wash after every use with hot soapy water, rinse thoroughly and air dry upside down. Ceramic pots are durable, but check them for chips or cracks, which can be hard to clean. Plastic pots should be replaced on the same kind of schedule as plastic bottles.
Don’t forget the solution side
A clean bottle works best alongside clean ingredients and safe water.
Use safe water every time. U.S. health authorities advise against using untreated tap water for nasal rinsing. Use distilled water, sterile water, or tap water that has been boiled and cooled to lukewarm. If you boil water ahead of time, store it in a clean, closed container and use it within 24 hours.
Keep your ingredients sealed. Using single-use nasal rinse packets also helps, because each portion stays sealed and dry until the moment you open it, rather than sitting in an open jar in a humid bathroom where it is exposed every time you reach in with a spoon.
Mix fresh every time. Prepare one rinse, use it, and discard what is left.
Storage tips
Where and how you store your bottle matters almost as much as how you clean it.
- Store the dry bottle in a clean cabinet or drawer, not on the counter beside the sink.
- Keep the cap off or loose until the bottle is completely dry.
- Keep your bottle and packets together so your kit is always complete.
- Use a clean pouch for travel, and make sure the bottle is dry before packing.
- Keep packets and equipment out of reach of children and pets.
One bottle per person
A rinse bottle is a personal item, like a toothbrush. Even within a household, everyone should have their own. If several people in your home rinse, consider bottles in different colors or label them so they do not get mixed up.
Building cleaning into your routine
The easiest way to keep a bottle clean is to treat cleaning as the final step of the rinse itself, not a separate chore. A few simple habits make that automatic:
- Keep soap and a brush at your rinse station, so you never need to go looking for them.
- Clean before you leave the bathroom. If you walk away to deal with it later, later rarely comes.
- Pick a weekly deep-clean day, such as Sunday evening, and set a recurring reminder.
- Keep a spare bottle on hand, so you can swap in a fresh one the moment the old one shows signs of wear.
Once these habits are in place, bottle care takes almost no thought at all.
Common mistakes to avoid
- Leaving leftover solution in the bottle
- Screwing the cap back on while the bottle is still wet
- Drying the bottle right next to the sink
- Using cleaning methods the manufacturer has not approved
- Keeping a bottle long past its replacement date
- Sharing a bottle with someone else
A quick checklist
- Empty, wash, rinse and air dry after every use
- Deep clean weekly, following the maker’s guidance
- Inspect for wear during each deep clean
- Replace on schedule or at the first sign of damage
- Always use safe water and fresh solution
- Store dry, in a clean place
- One bottle per person
The bottom line
Caring for your rinse bottle takes a minute or two each day, plus a few extra minutes each week, but it makes a real difference to how clean your routine is. Treat it like a toothbrush: clean it, dry it, store it well and replace it on time.
As always, follow the directions and warnings that came with your bottle and rinse product. If you have questions about nasal rinsing, speak with a healthcare professional.